
Meta Pixel Integration Guide
This guide covers the Facebook Ads → WhatsApp landing page → WhatsApp conversation funnel. Meta Pixel will record page visits and WhatsApp clicks.
Step 1: Create a Meta Pixel
Open Meta Events Manager and click Connect Data Sources.
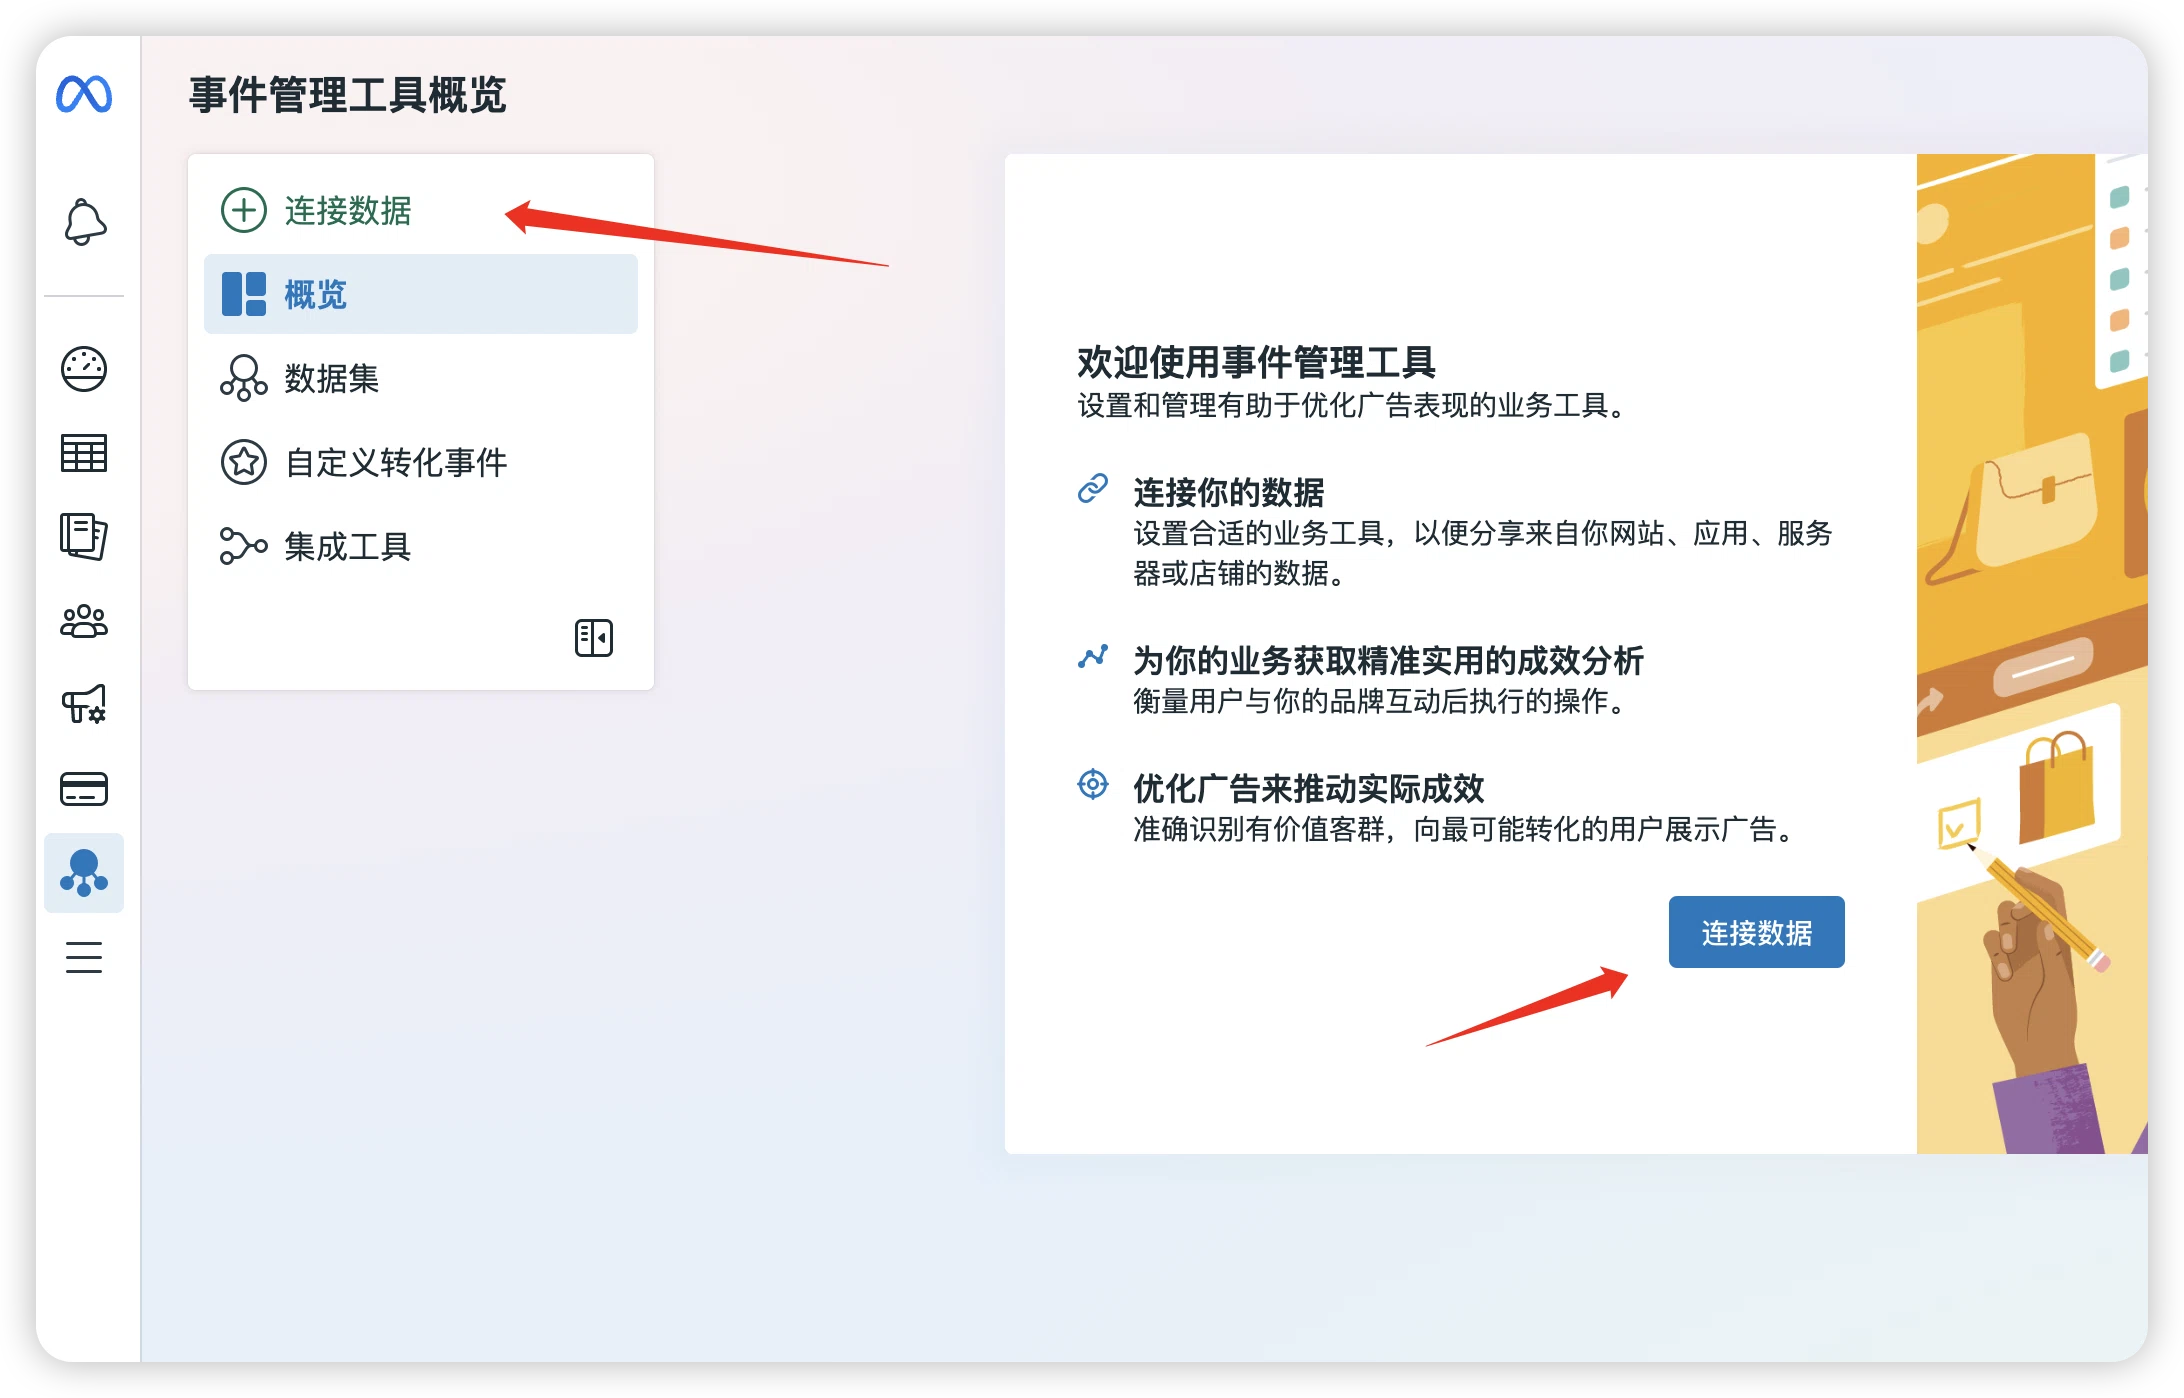
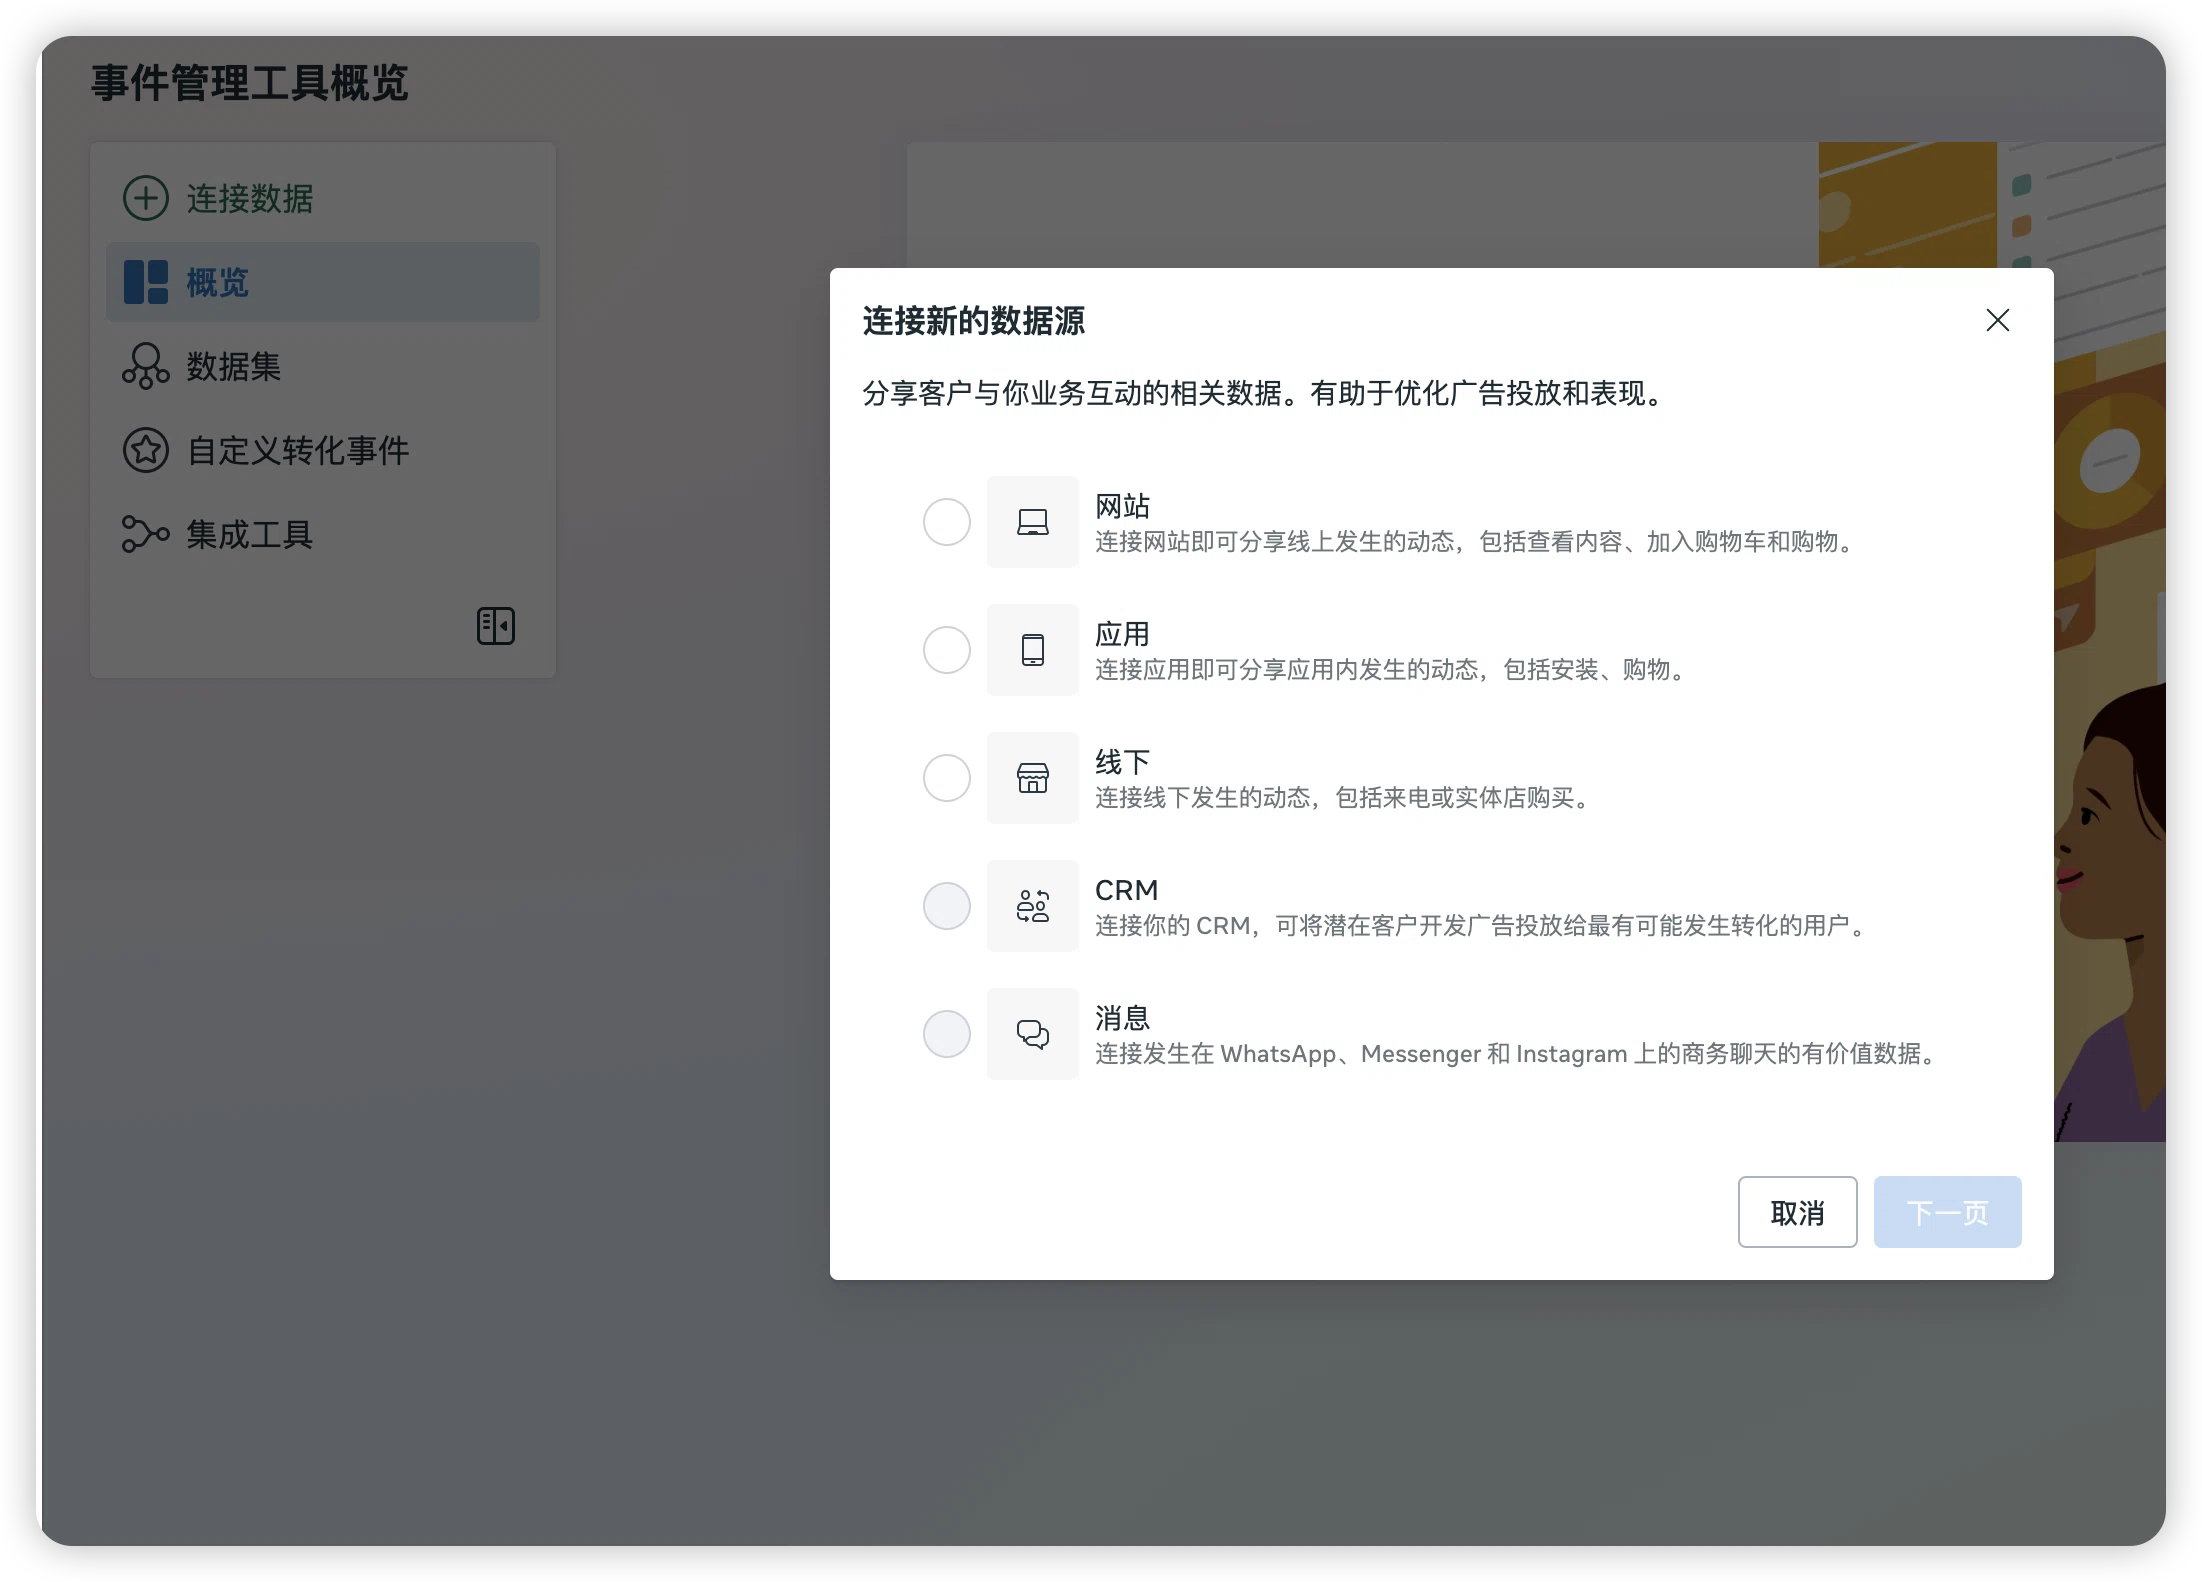
Select Web, click Next, choose Meta Pixel, enter a name such as Creght WhatsApp Pixel, and click Create.
One website normally needs only one Pixel.
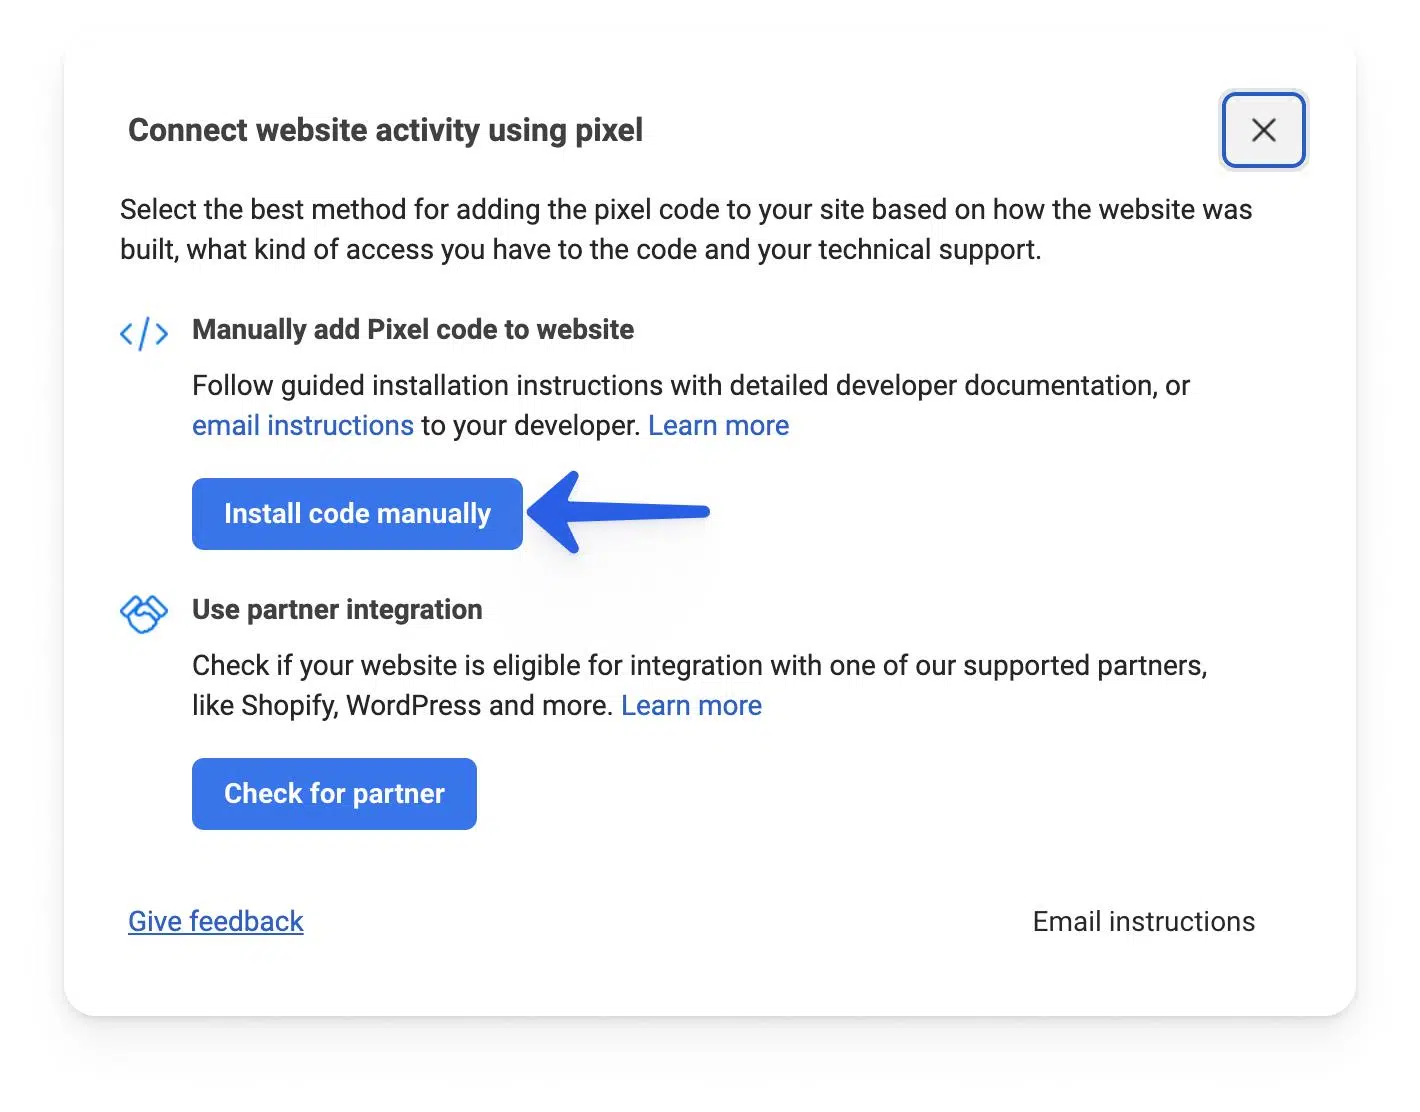
Step 2: Choose Manual Installation
Choose Install code manually. Do not choose Partner Integration, WordPress, Shopify, or Google Tag Manager.
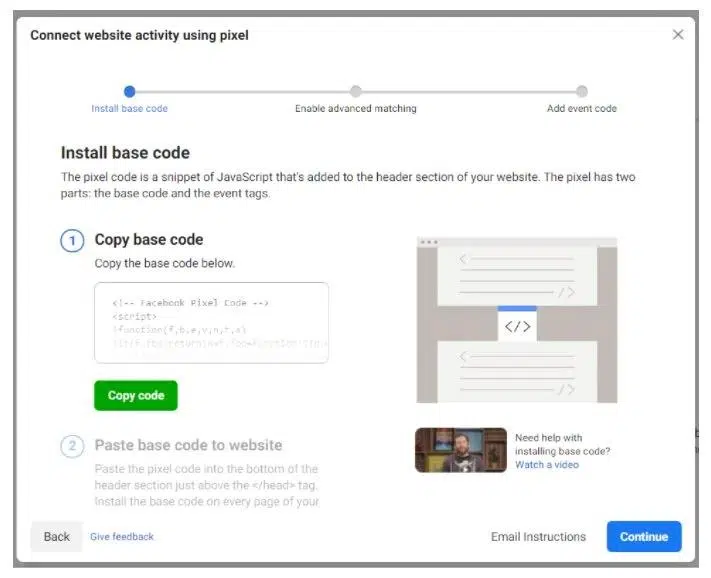
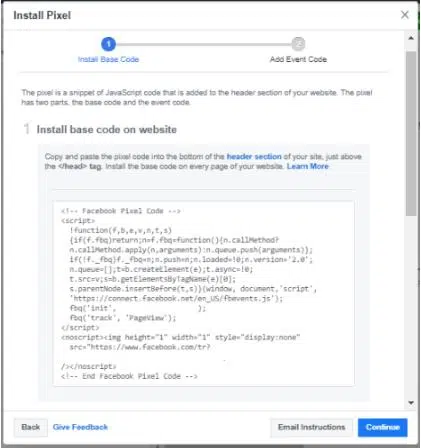
Step 3: Copy the Base Pixel Code
Meta generates the code automatically. Click Copy Code and do not change the Pixel ID.
<!-- Meta Pixel Code -->
<script>
!function(f,b,e,v,n,t,s){...}
fbq('init', '123456789012345');
fbq('track', 'PageView');
</script>
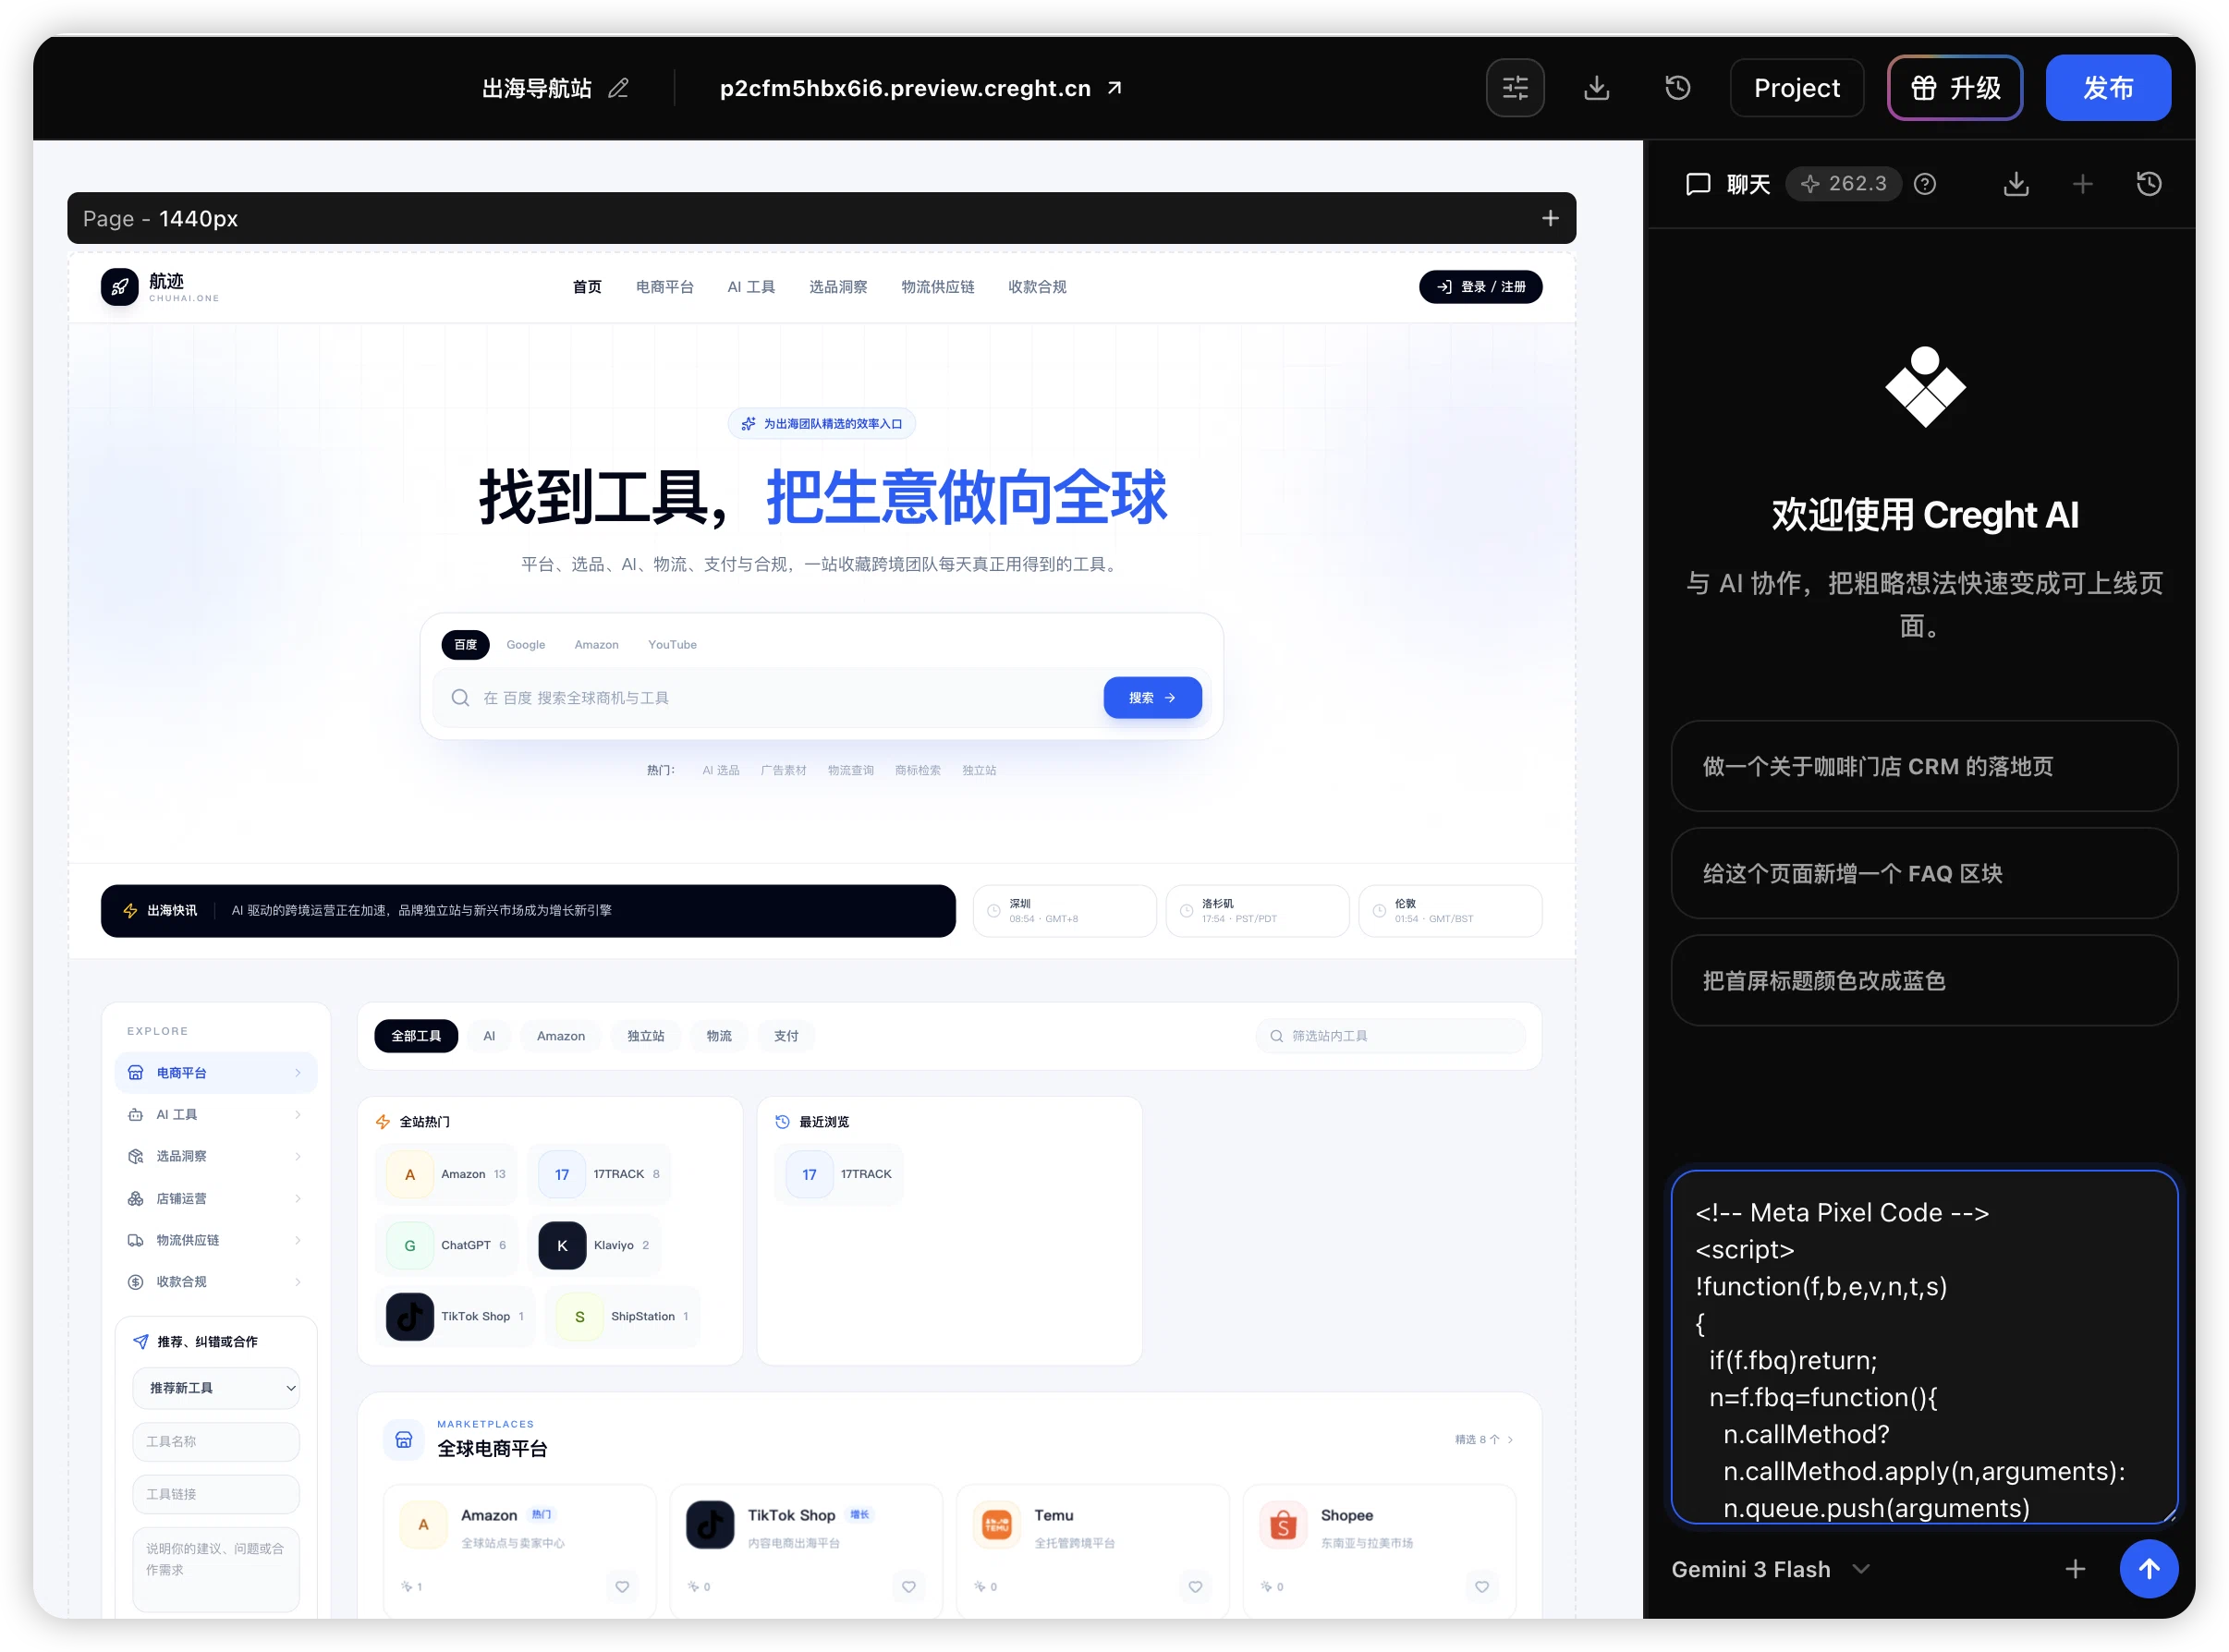
Step 4: Install It on Your Creght Site
Open the website editor, paste the full code into the AI chat on the right, and send it to AI.
Step 5: Track WhatsApp Clicks
Ask AI: Add the Facebook WhatsApp click event for me. Meta will then receive a Contact event for every WhatsApp click.
| User action | Meta event |
|---|---|
| View the page | PageView |
| Click WhatsApp | Contact |
Step 6: Publish the Website
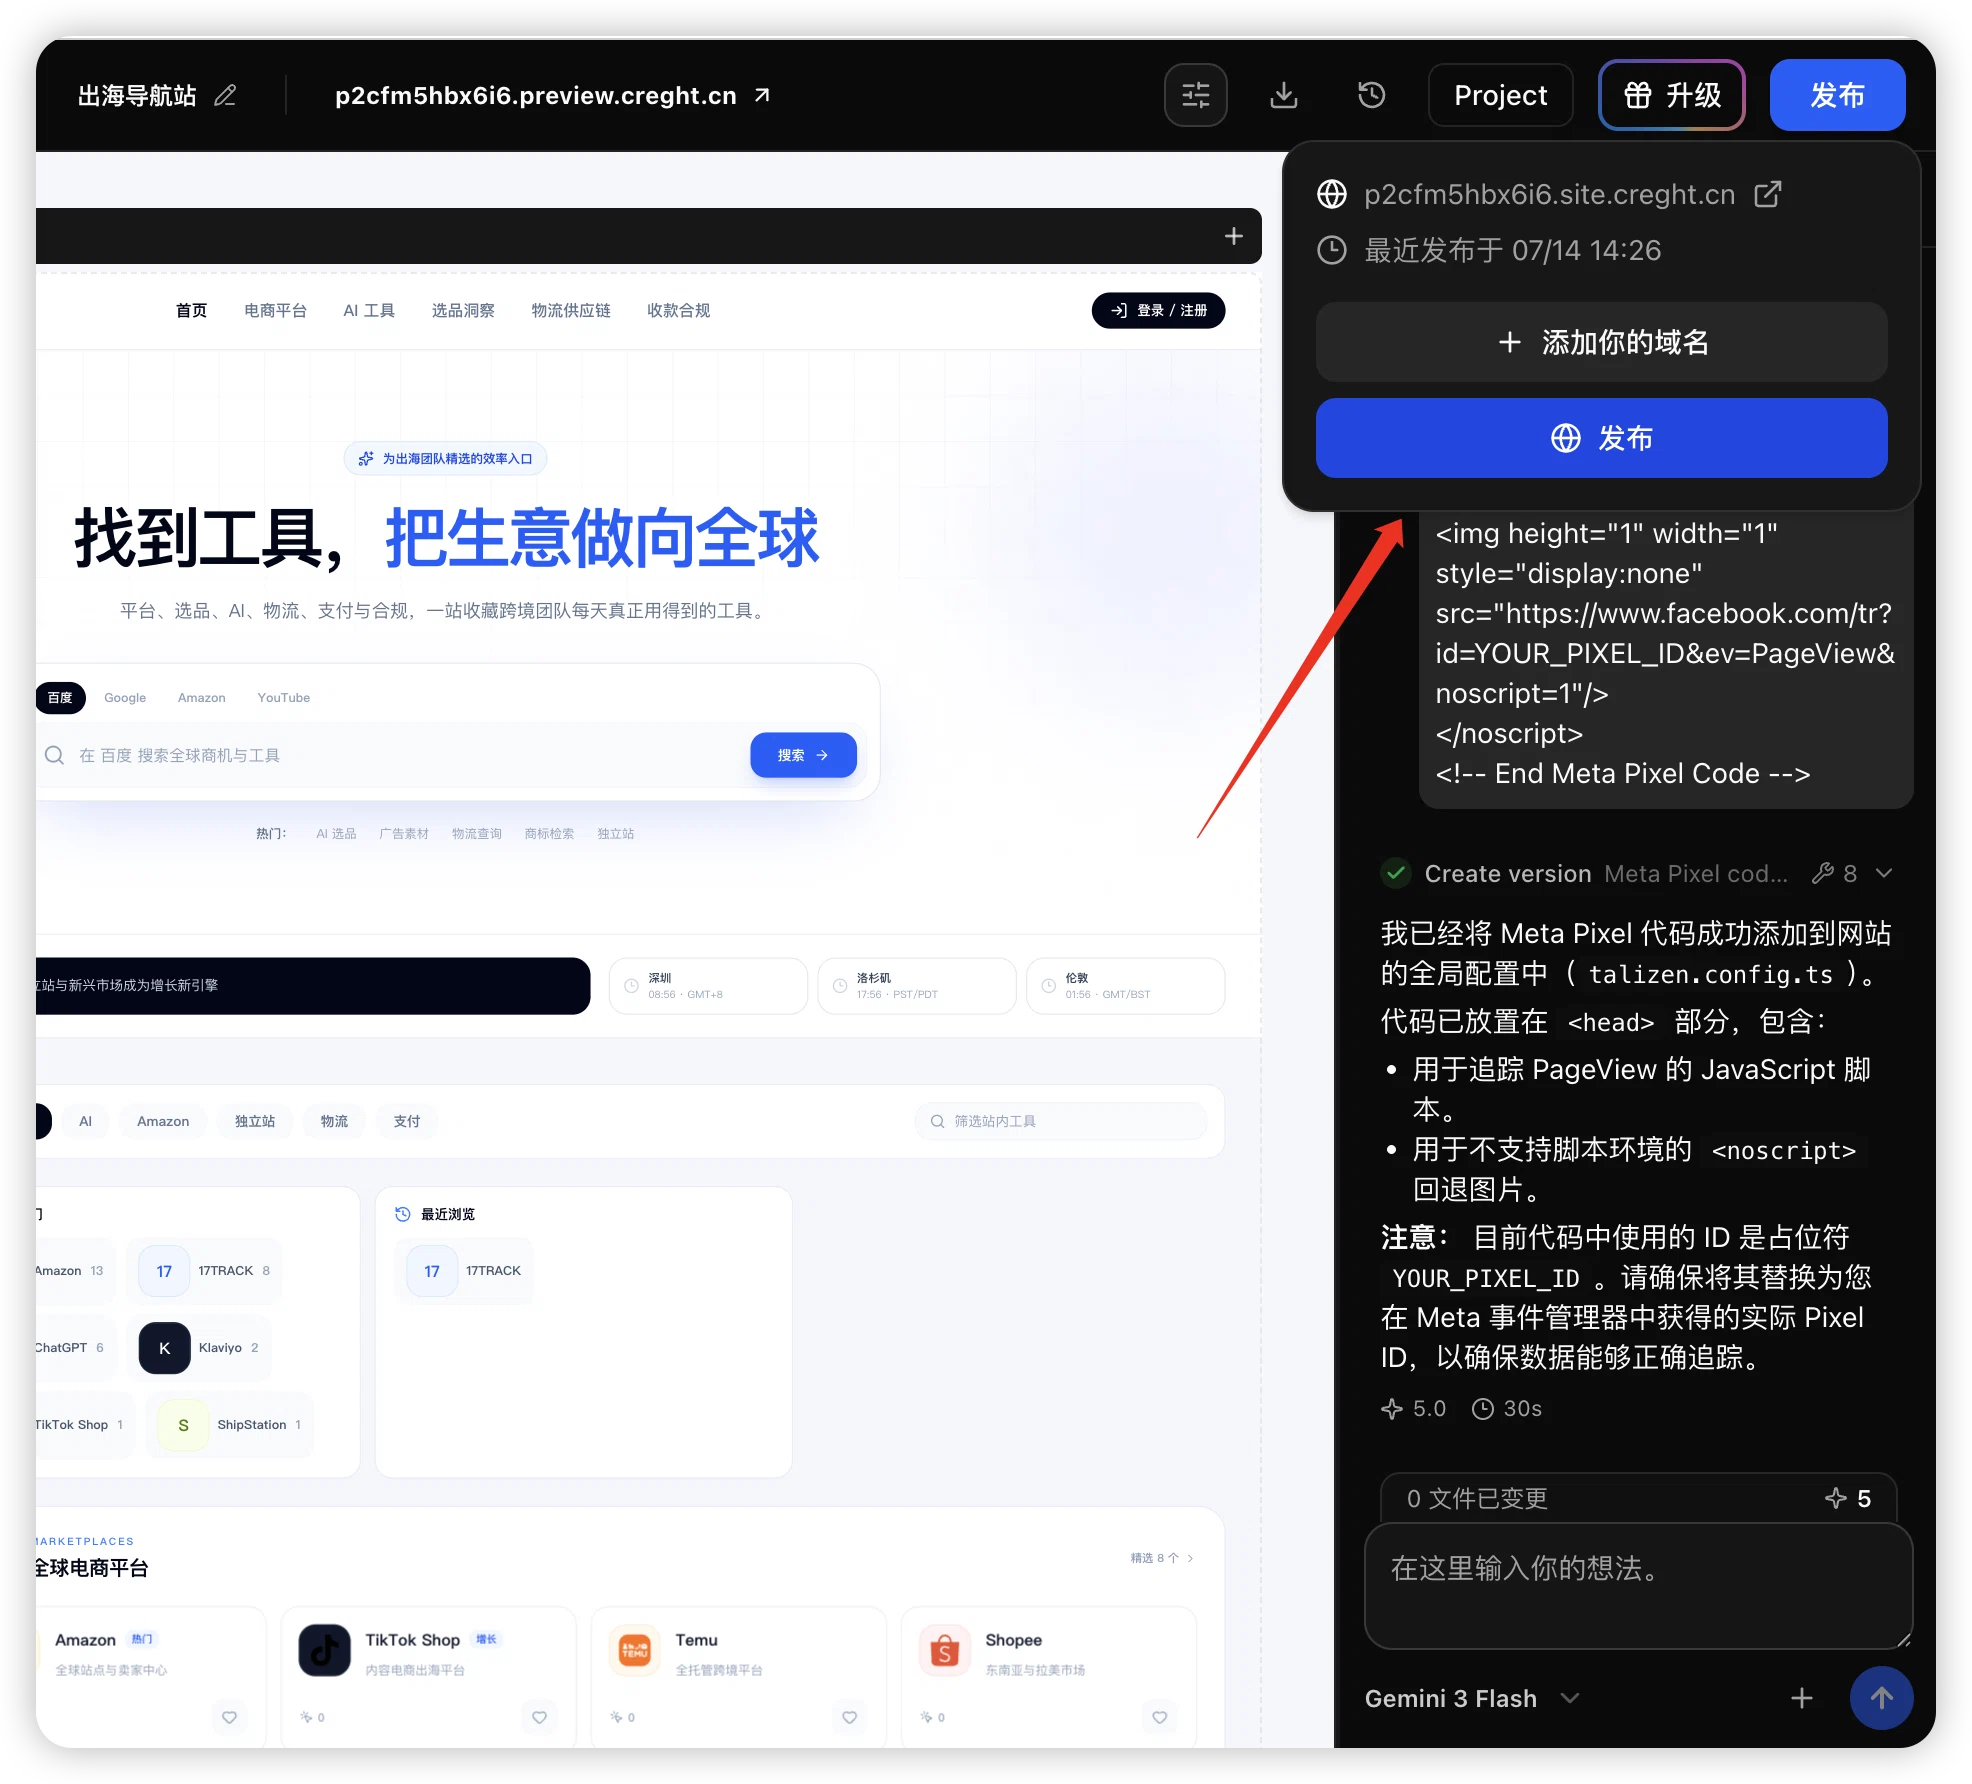
Click Publish and wait for publishing to finish. The Pixel becomes active only after republishing.
Step 7: Test the Pixel
Return to Events Manager, select the Pixel, and open Test Events.
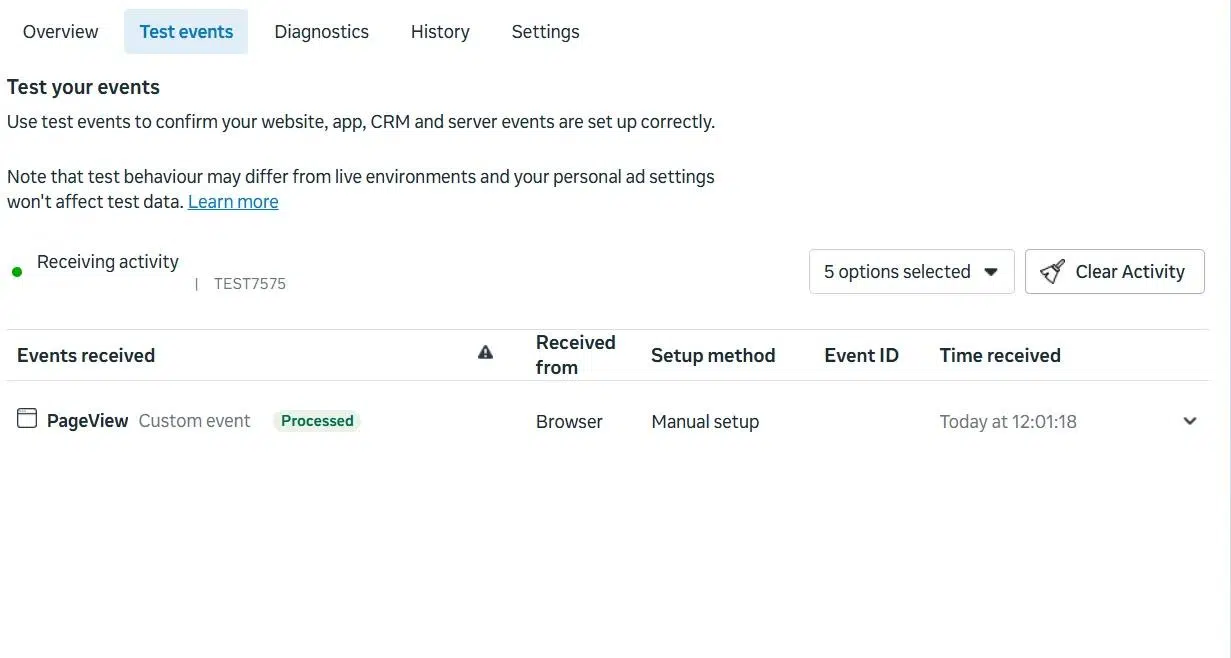
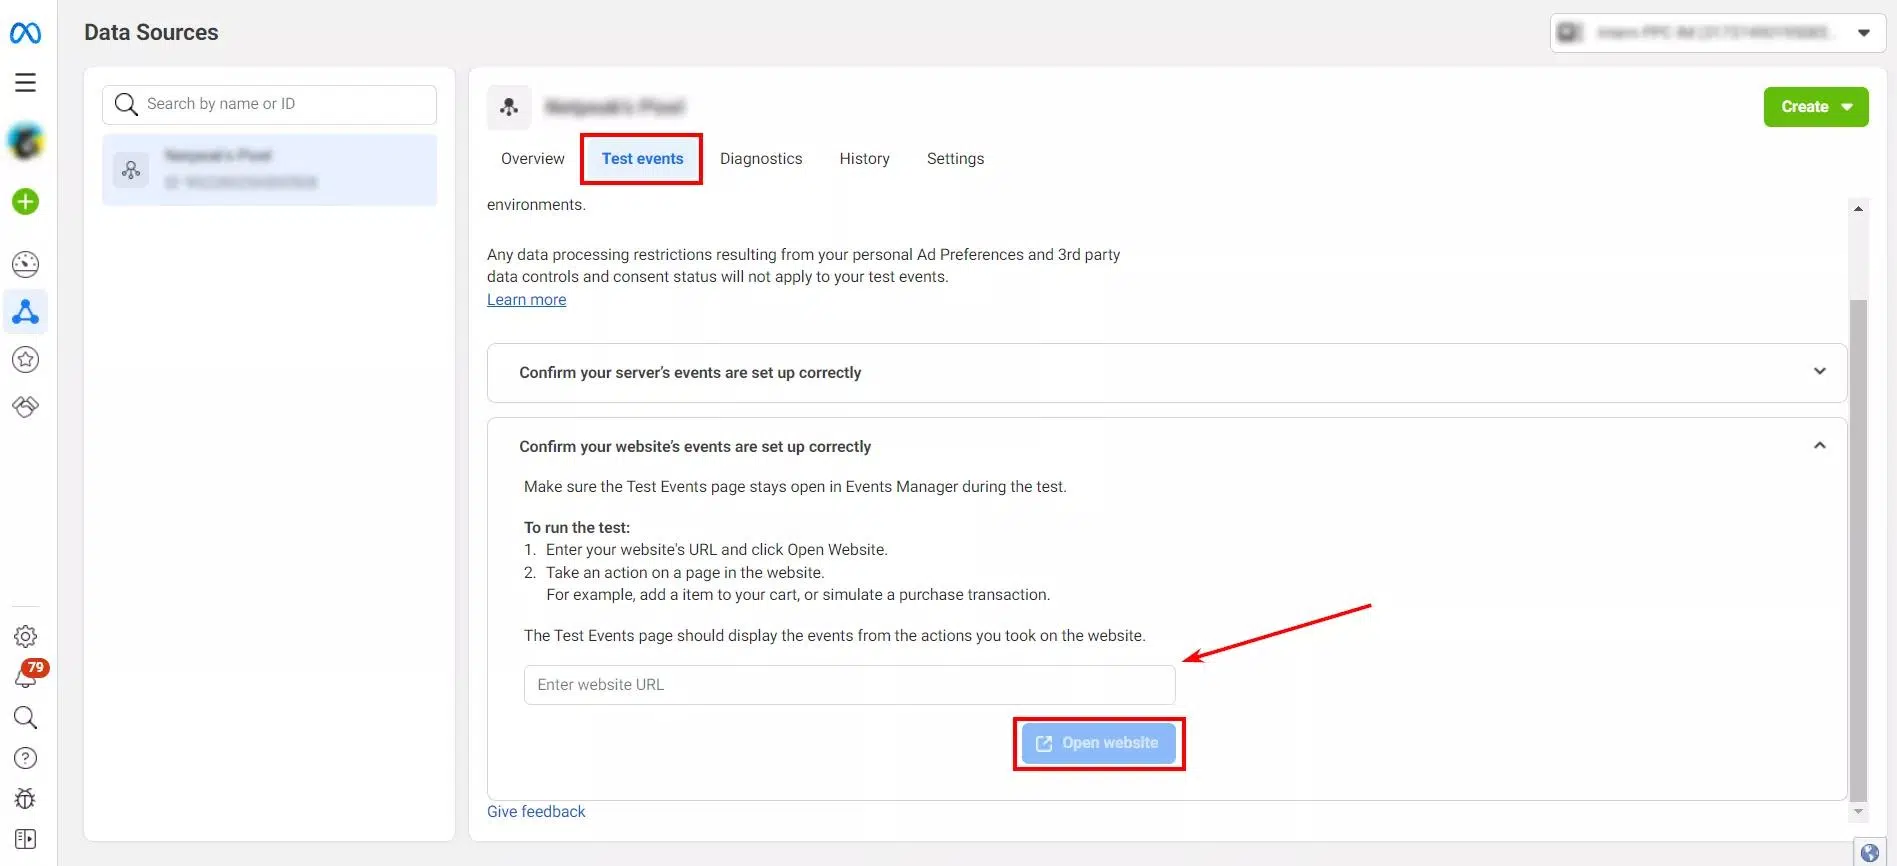
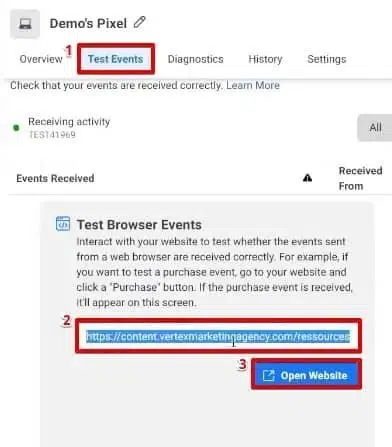
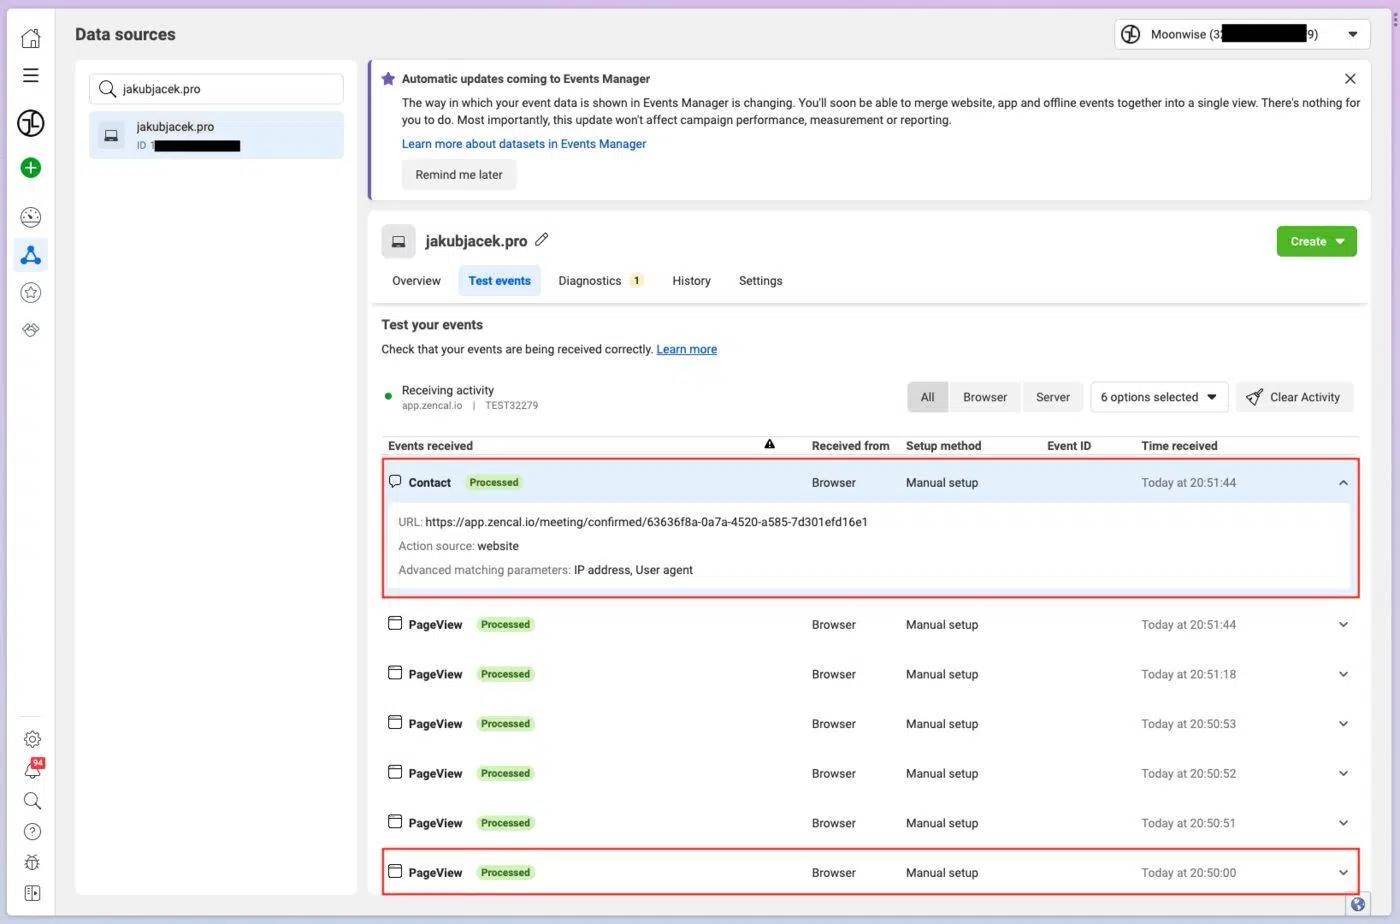
Enter your site URL, click Open Website, refresh the page, and click WhatsApp. A successful setup shows PageView followed by Contact.
Step 8: Check with Meta Pixel Helper (Optional)
Install the Meta Pixel Helper Chrome extension and open it on your website.
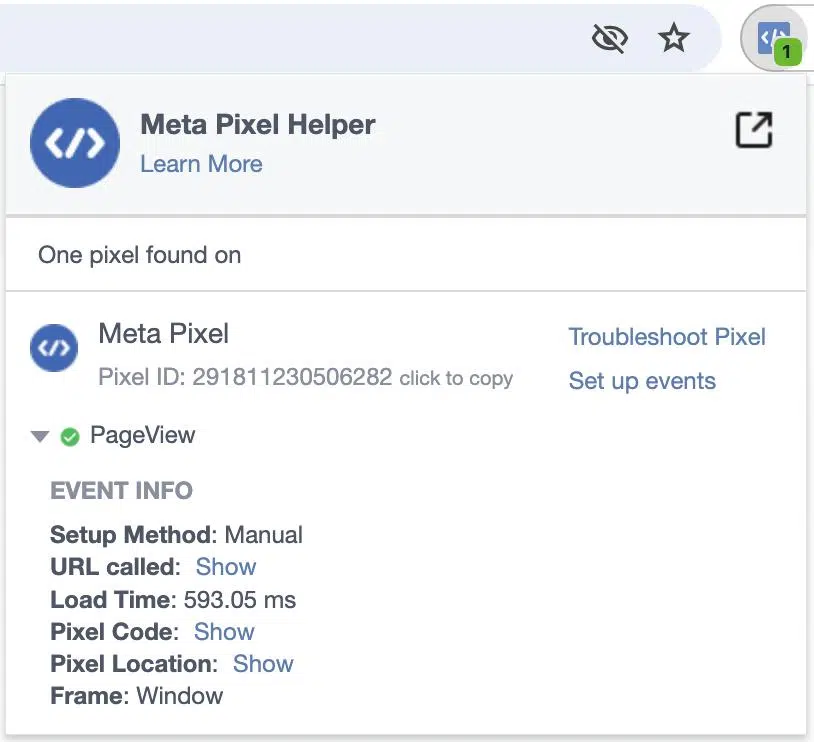
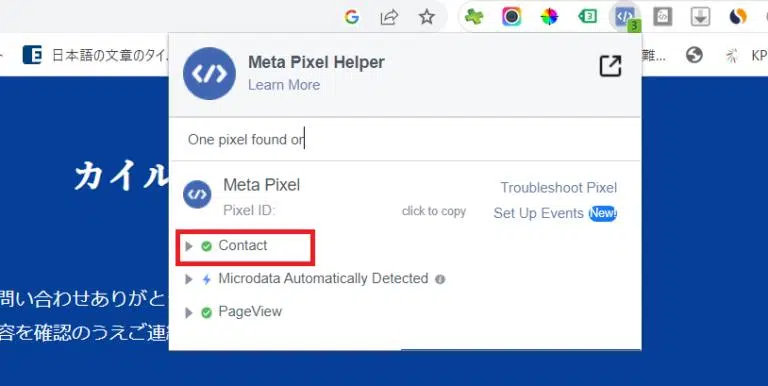
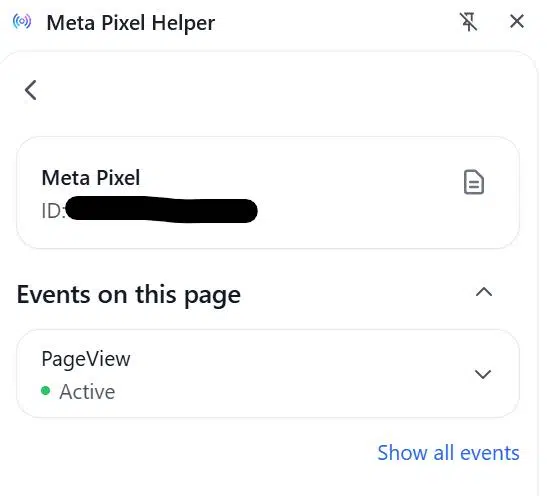
A correct setup shows 1 Pixel Found and PageView. Clicking WhatsApp adds Contact.
Recommended Events
| Event | Purpose | Recommendation |
|---|---|---|
| PageView | Measure page visits | Required |
| Contact | Measure WhatsApp clicks | Strongly recommended |
If you later add an enquiry form, trigger fbq('track', 'Lead'); after successful submission.